
Return Items
1. From the main menu press the Return key.
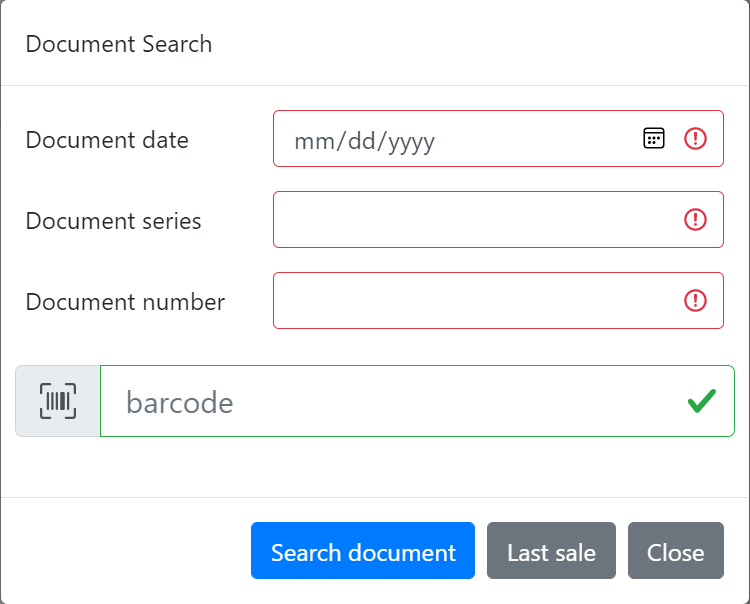
A search window will open where you will add the following data regarding the receipt for which you want to create a return invoice:
The document date - select the receipt's date;
The document's series;
The document's number - write the document number for the sale. The number can be found on the receipt.
For a faster search you can use the following options:
Search receipt by scanning the barcode - scan the barcode from the printed receipt. The date, series and number of the receipt will be automatically added.
Search the receipt by pressing Last Sale - use in the case the invoice will be issued for the last sale.
2. In the window the item/items the client bought will be shown.
If there are multiple items on the receipt and the client wants to return only some of them, select and remove only the items the client wants to keep.In the sale window only the items the client wants to return will remain.
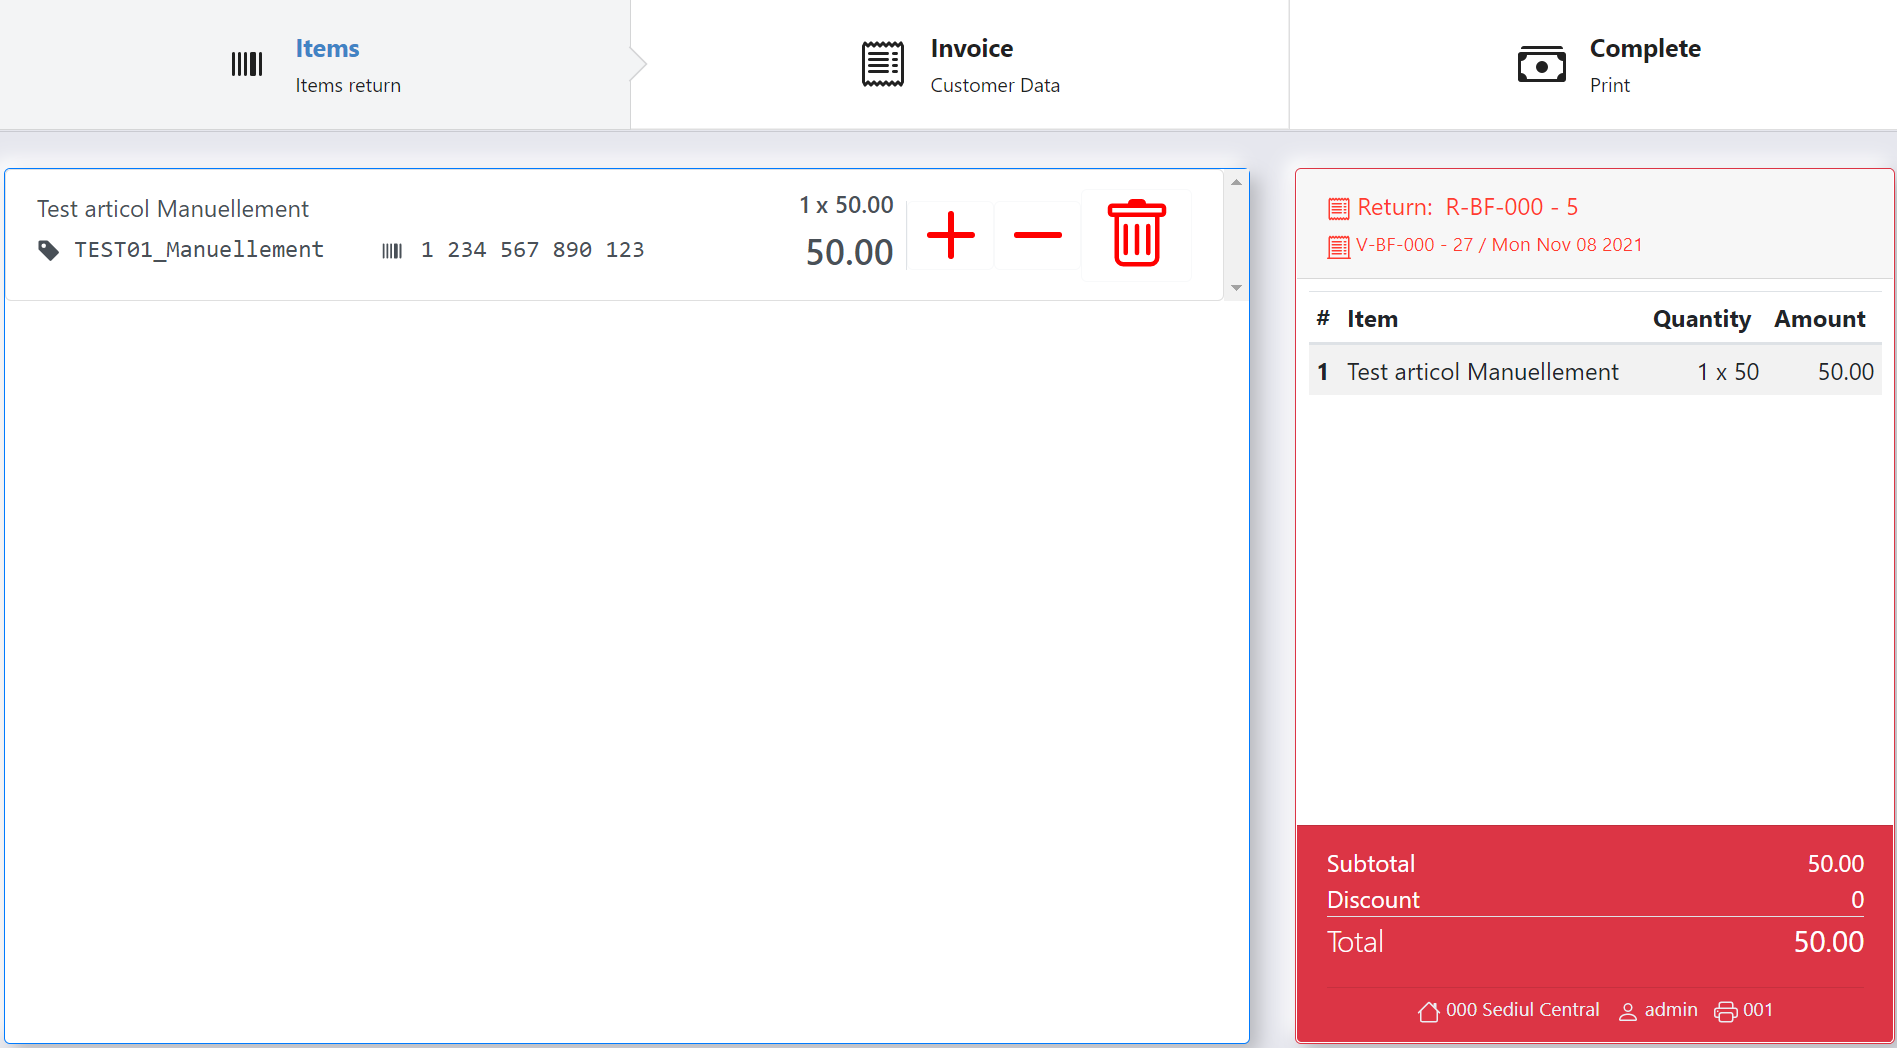
If there are multiple items of the same type on the receipt, use the + and - keys to modify the quantity.
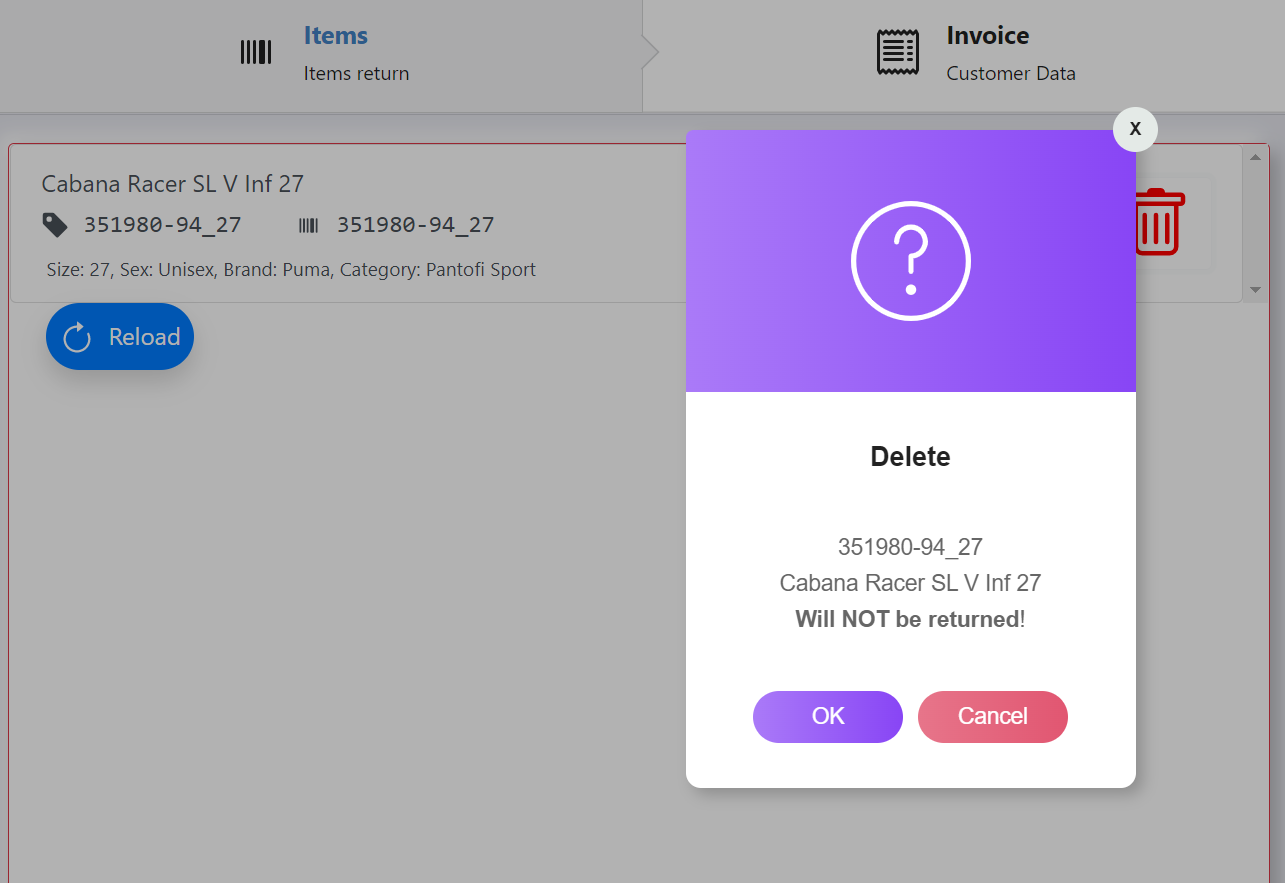
In order to remove an item from the window press the garbage can key. A window will open in which you must confirm if you want to remove or not the item.
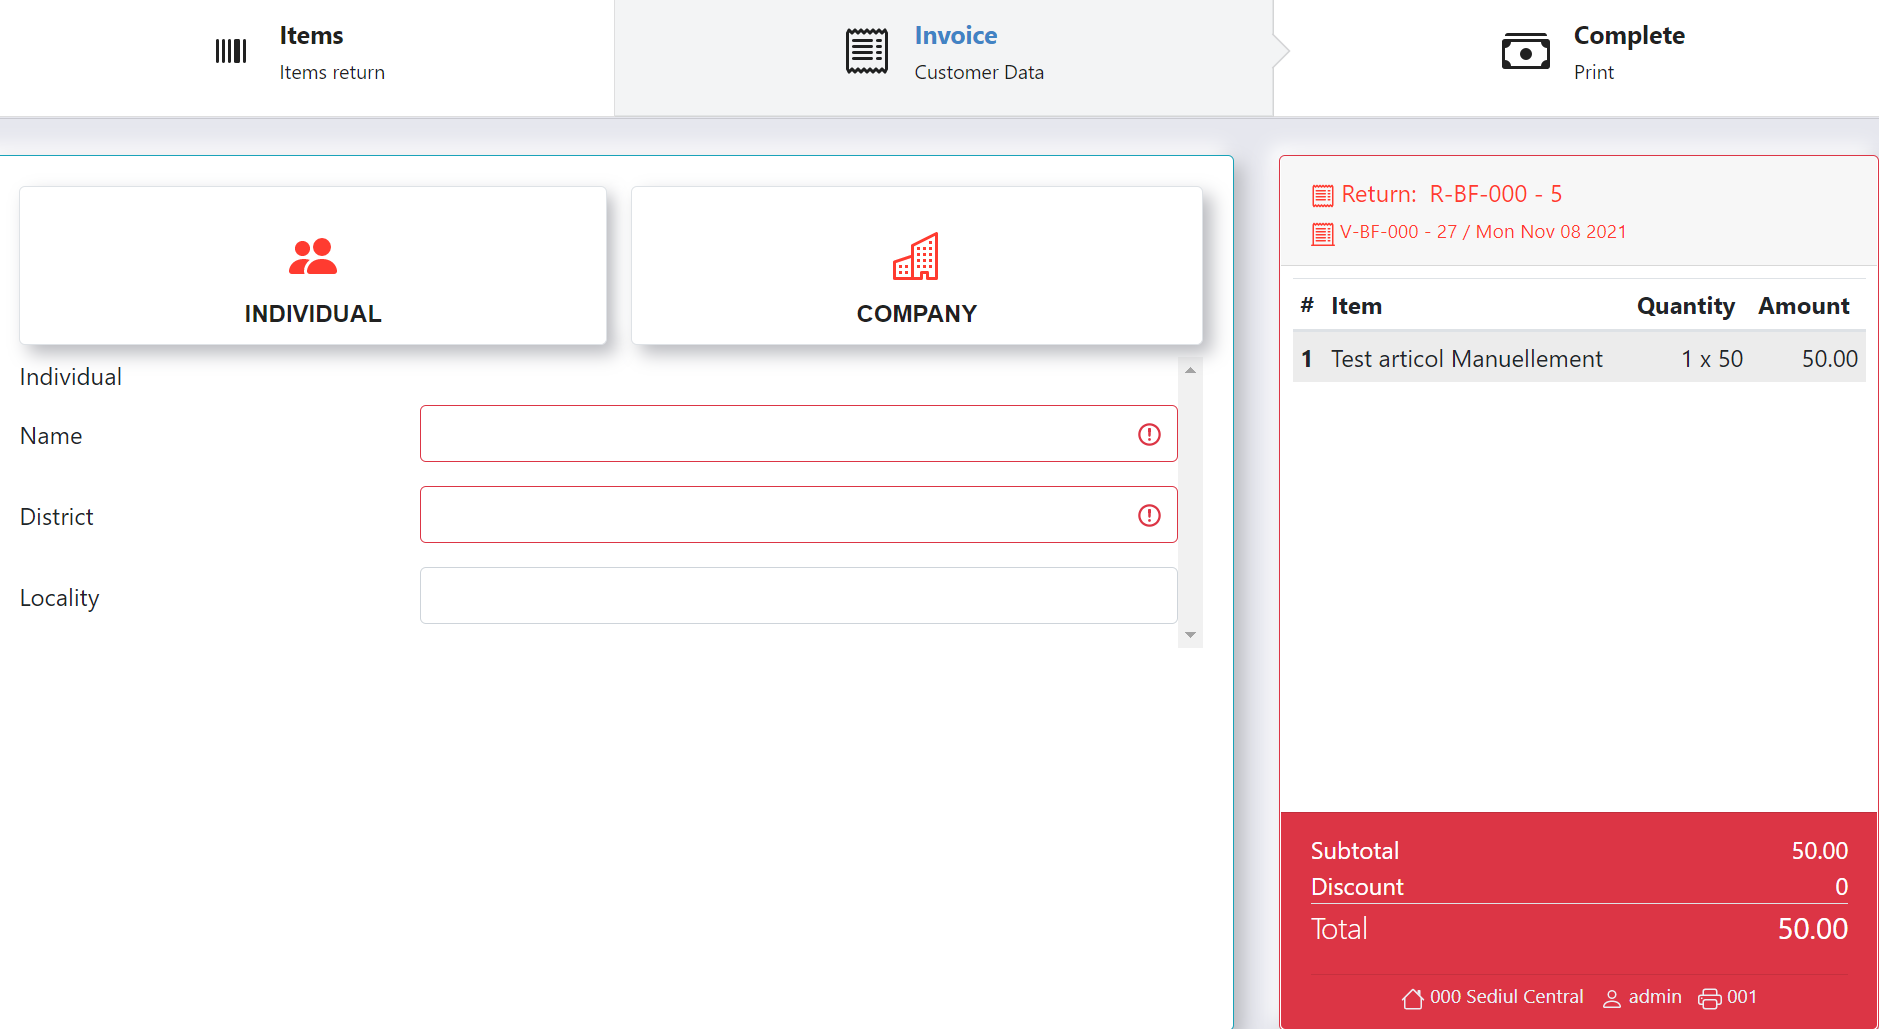
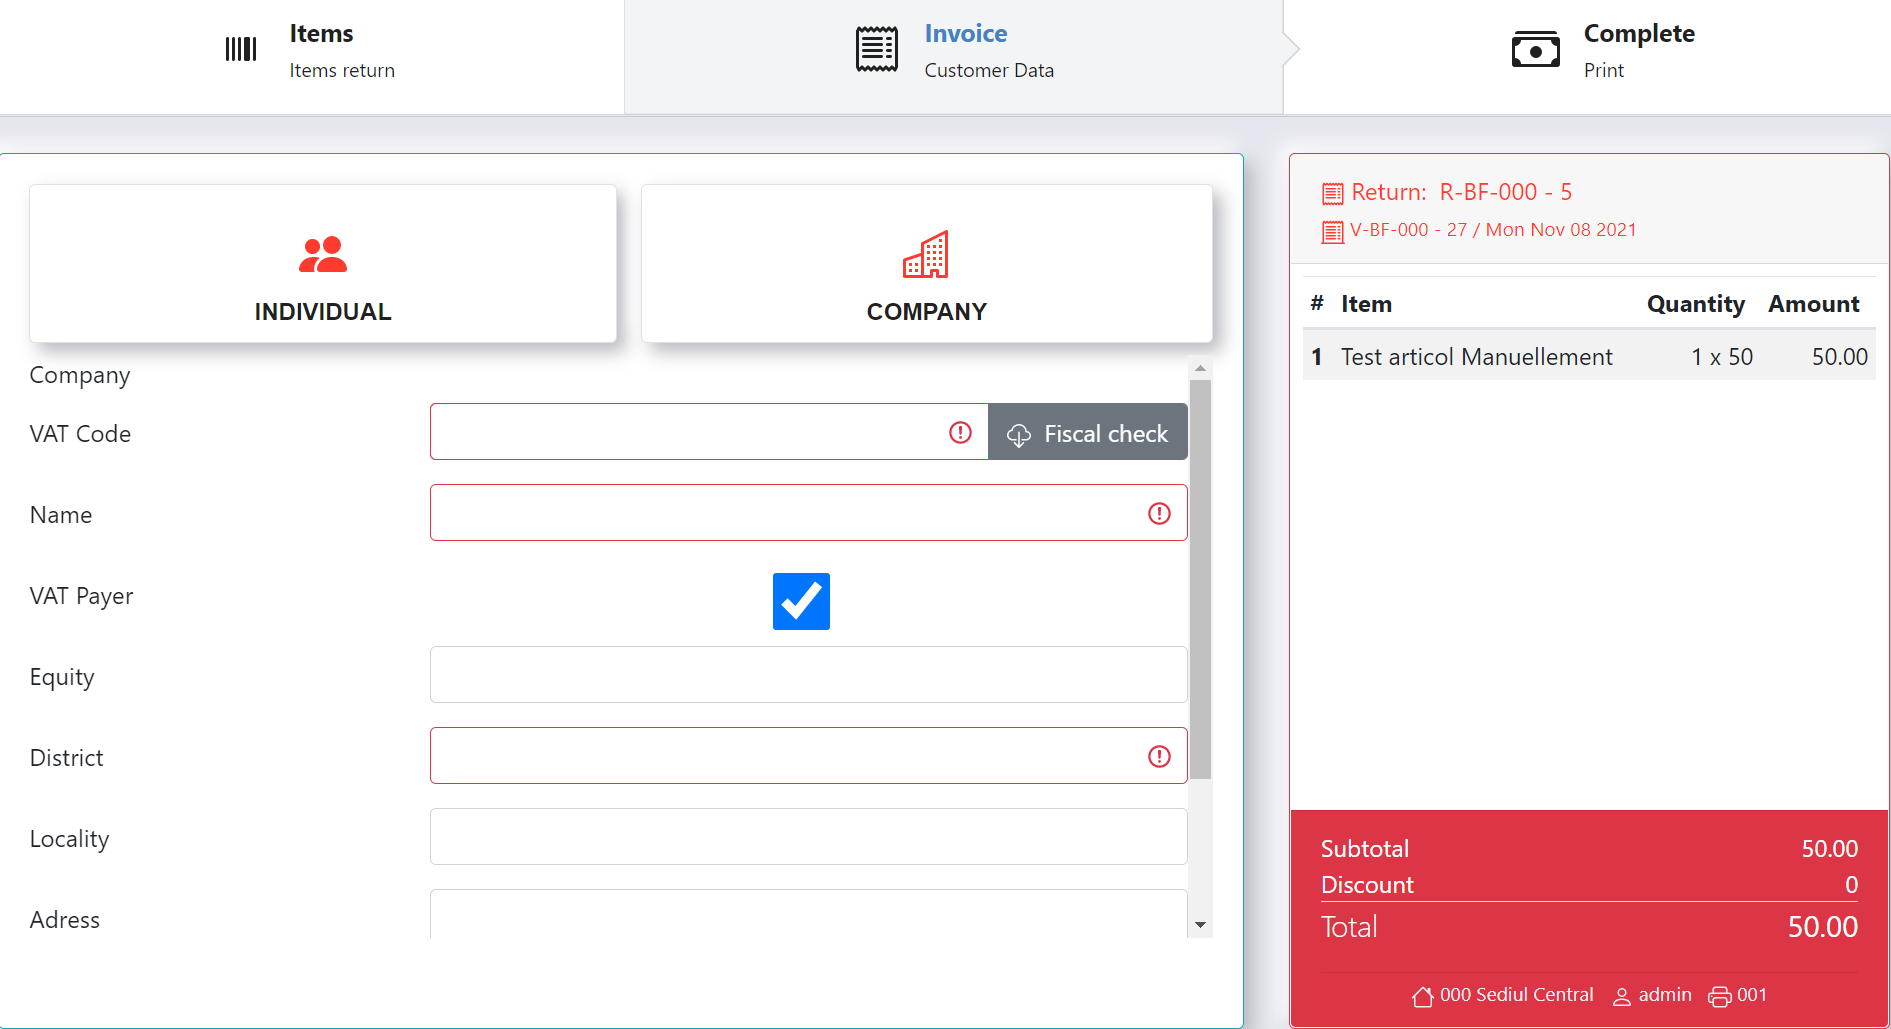
3. The invoice data will be added.
Attention! Before you complete the invoicing data, ask the client if the receipt for which the return is done has an issued invoice.- If the return is done for a receipt (individual), the resulting invoice will be issued for an individual.
- If the invoice was issued for a company, the return will be done for the same company.
- If the invoice was issued for an individual the return will be done for the same individual.
Individual :
- Write the client's name
- Choose the District from the list.
- The Locality will be written manually or selected from the list.
Company :
- Add the VAT Code and then press Fiscal Check. The program will automatically add the client's invoicing data based on the VAT given by the client.
- Add the Equity.
- Select the District from the list.
- Add the Locality.
- Add the Address and bank information's.
4. In order to issue and print the documents press Complete and Print.
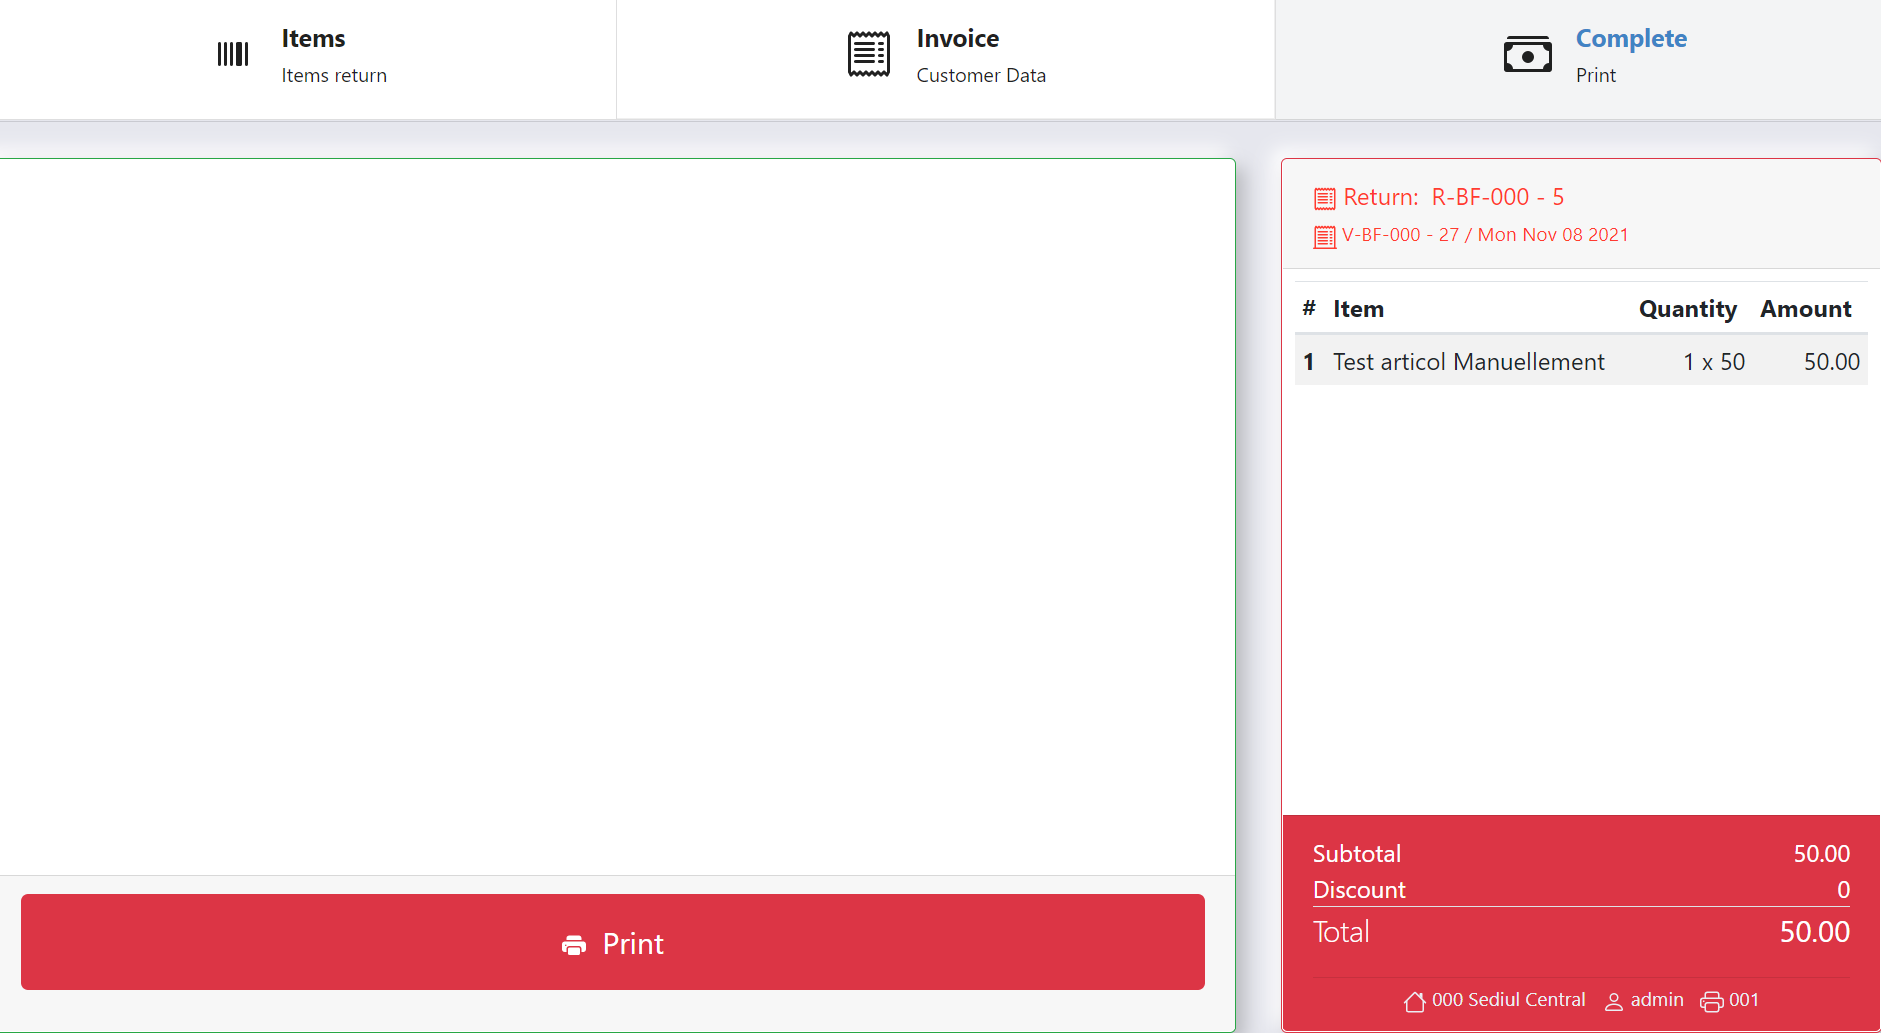
When a return is issued it will also create and issue an invoice and a payment order.